Manage Objective-C dependencies with Cocoapods on Swift project
One of my biggest concerns when Apple announced Swift lang was how to integrate Objective-C libraries on new projects. I’m not a big fan of Objective-C, but there are many awesome libraries on Cocoapods like AFNetworking for networking activities like HTTP requests and MBProgressHUD for activity indication, like “loading” or “completed” notification. They are almost essential for most of iOS apps and Cocoapods is the best way to manage dependencies for Objective-C code.
Fortunately Apple documented the process to use Objective-C code on Swift projects and I’ll cover it step by step.
1. Install Cocoapods
It is quite simple. Just open your terminal and run
sudo gem install cocoapods.
2. Initialize cocoapods
On your iOS project, type pod init. It generates Podfile with the
content below.
1
2
3
4
5
6
7
8
9
10
11
# Uncomment this line to define a global platform for your project
# platform :ios, "6.0"
source 'https://github.com/CocoaPods/Specs.git'

target 'CocoapodsExample' do

end

target 'CocoapodsExampleTests' do

end
3. Add the dependencies on Podfile
Podfile should have all the dependencies you need on your project. Now you add the dependencies inside the target block:
...
target 'CocoapodsExample' do
  pod 'MBProgressHUD', '~> 0.9'
end
...
4. Install the dependencies
pod install
5. Open you project with YourApp.xcworkspace
From now on, you always open you project using .xcworkspace file.
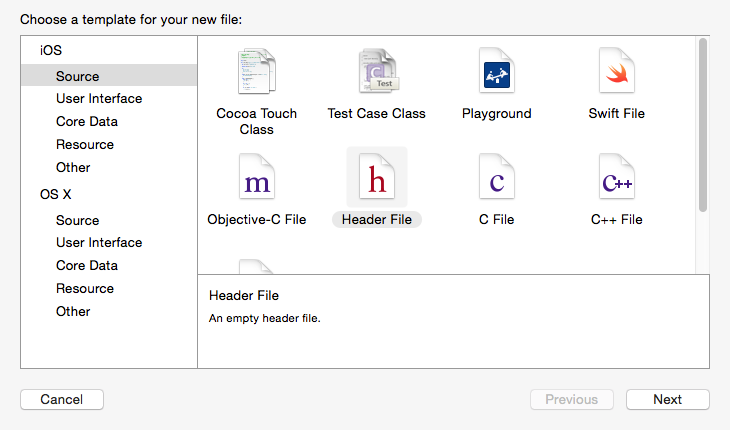
6. Add a Bridging Header for Objective-C libraries
Create a Header file on you project.
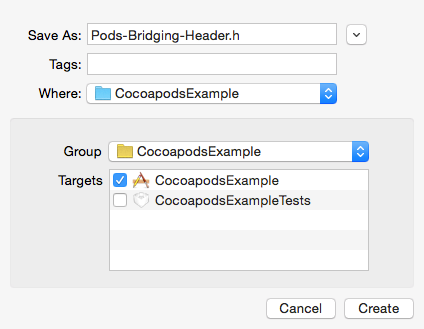
On the header file, import the library you added via Cocoapods or any other Objective-C library you would like to use on your Swift App.
//
// Pods-Bridging-Header.h
// CocoapodsExample
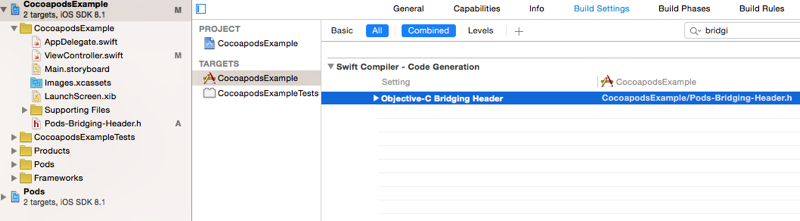
#import "MBProgressHUD.h"Add Objective-C Bridging Header on build settings. The path should be relative to your project.
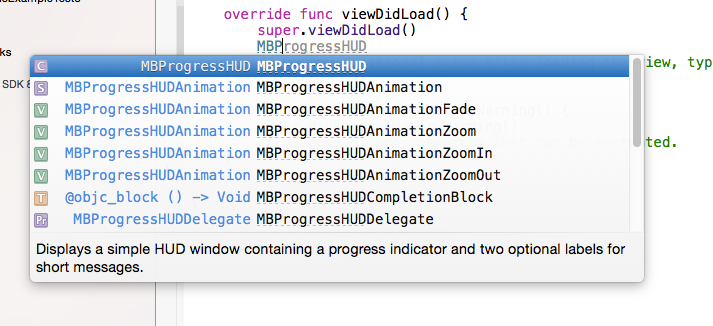
7. Enjoy
If you followed the steps correctly it should be working. You don’t need to import the headers. It is already imported on Pods-Bridging-Header.h.
Comments
comments powered by Disqus